Dumping Tapes…
…isn’t easy as it may appear at first glance. Analog media are prone not to deliver good bits over a long time and tapes are a slow and not very secure means, considering the bandwidth of an normal audio tape – it was cheap, though and many people, new to computers were not willing to spend the same amount of money on a 1541 disk drive, as it cost about the same as the C64 itself. So a lot of software was produced and published on tape. Although I belong to the lucky ones that had a disk drive right from the start a lot of cool original tapes have turned up in my collection over the years and after dumping all my original disks with a Kryoflux those are left….
It was quite convenient to dump disk while at work. I got nice old SCSI case from cAos that could house the a 3.5″ and 5.25″ Floppy, along with a PSU and the Kryoflux itself and so the footprint for the complete dumping equipment was very low. With the tape drive this would be another story, as the 1531 is hard to run headless. A long time ago, I had been toying around with dumping tapes and build a NAME HERE LINK HERE and equipped it with a jack for external power, using a 5V PSU. And yes,… despite many pessimistic comments it works. Plug the PSU into the NAME HERE adapter, plug the tapping on the the other side, plug the 1531 into the tapuino and you can dump tapes without the need of a C64 and a screen. Well…. not quite. This works fine for tapes that are good aligned, but you have no means to adjust the head when a tape is not loading.
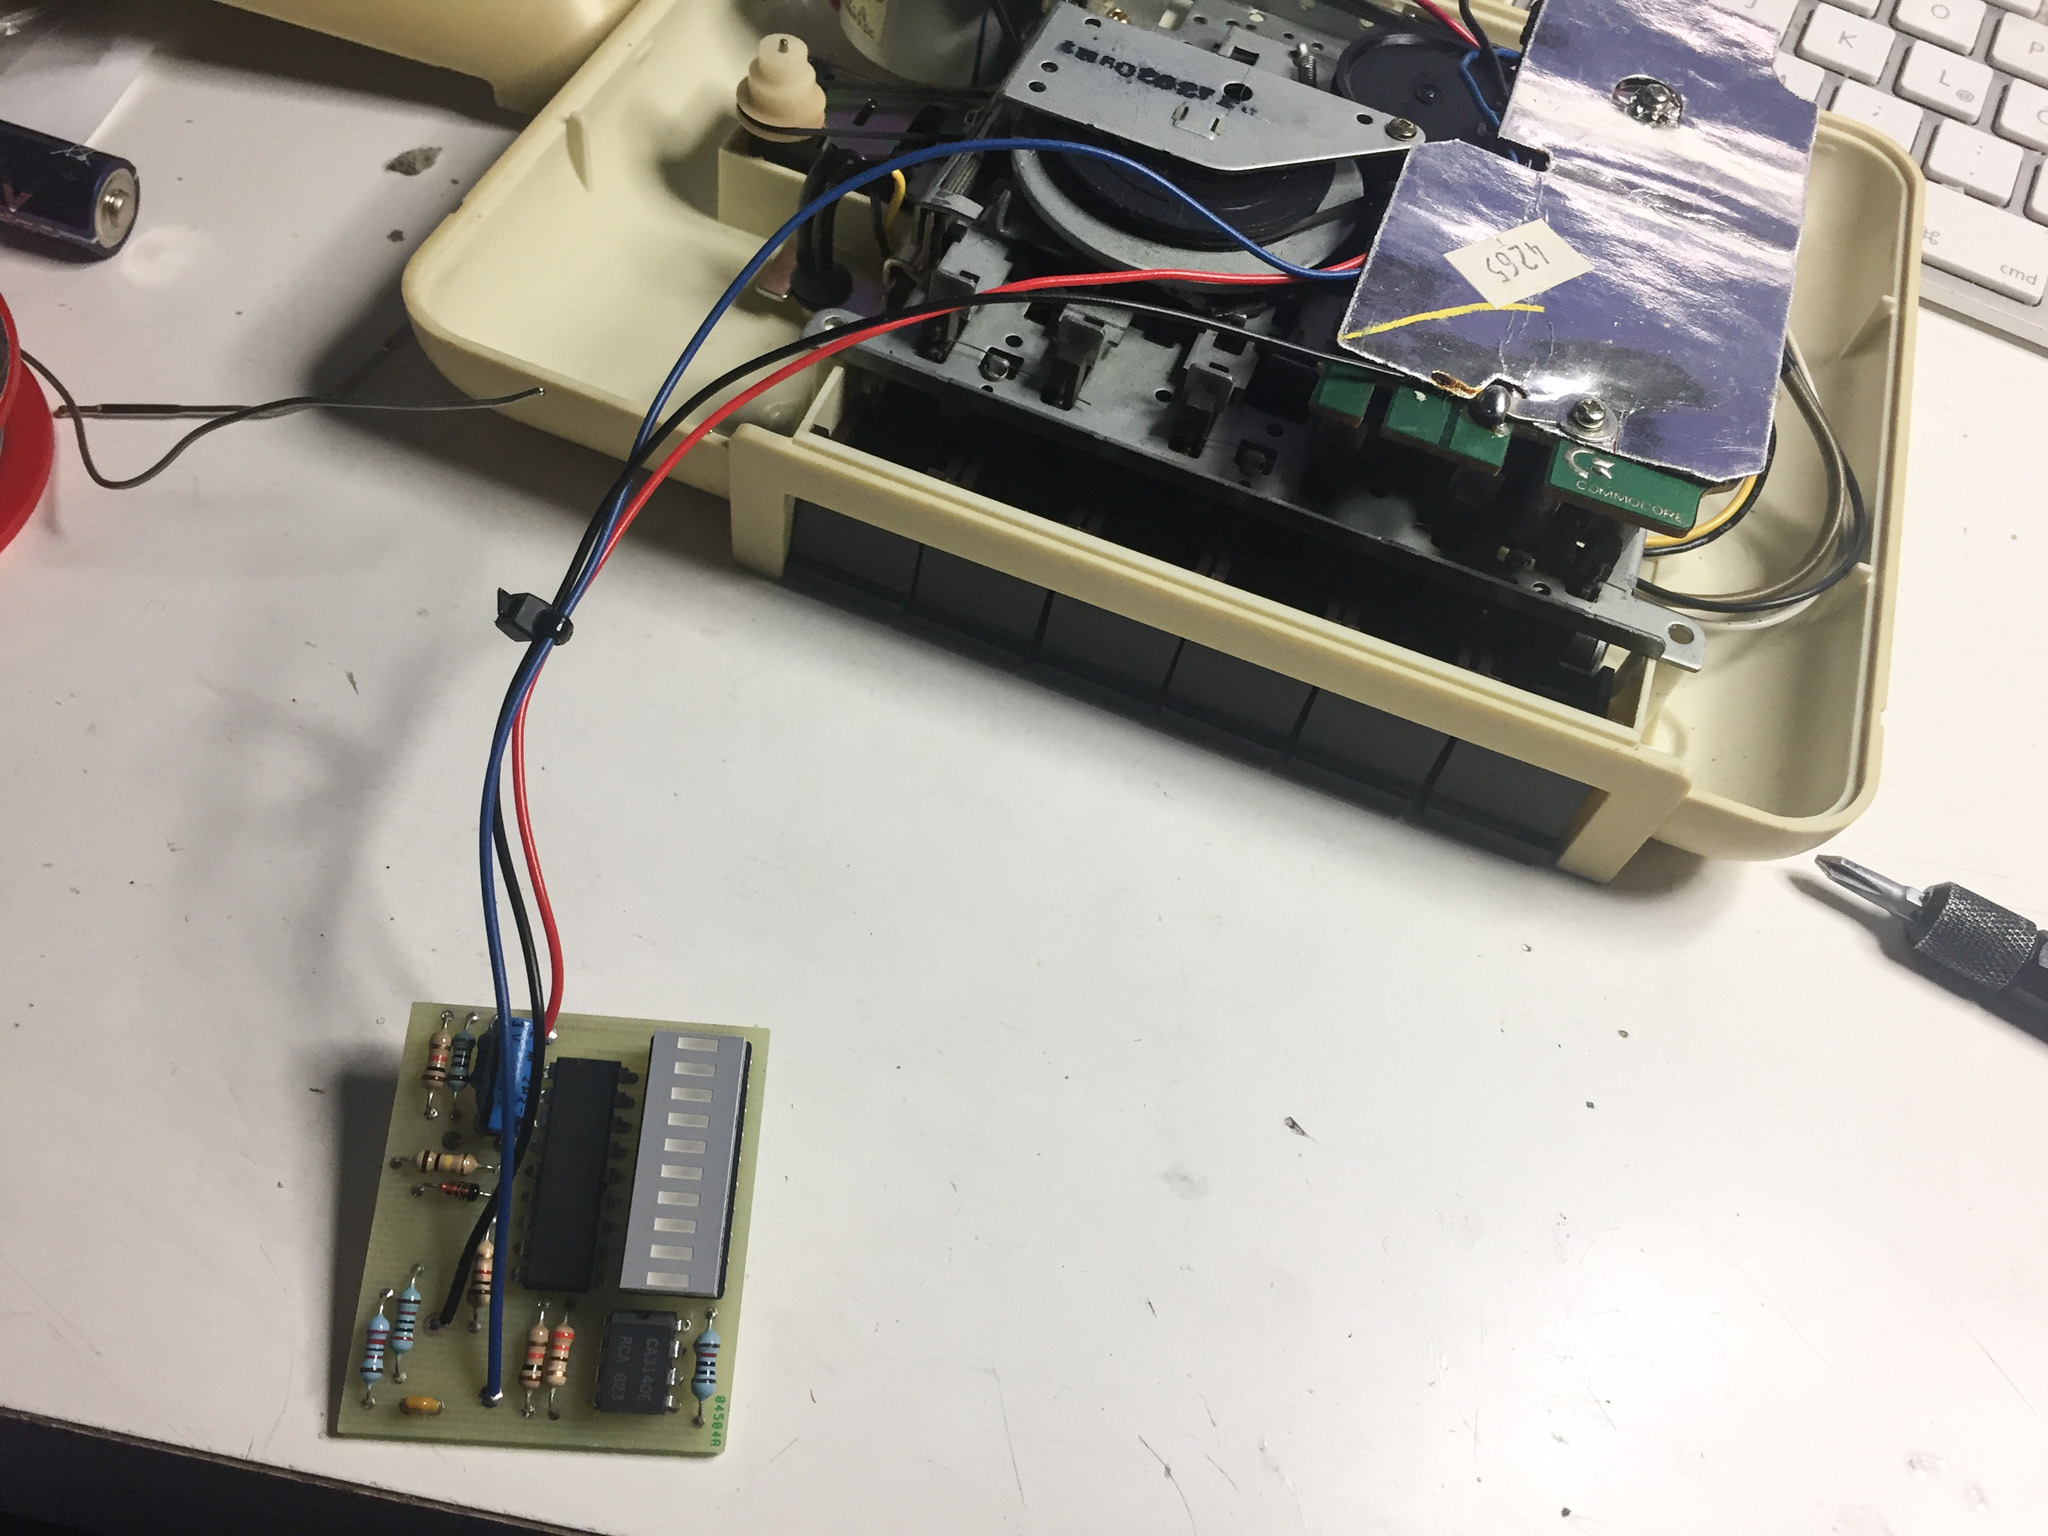
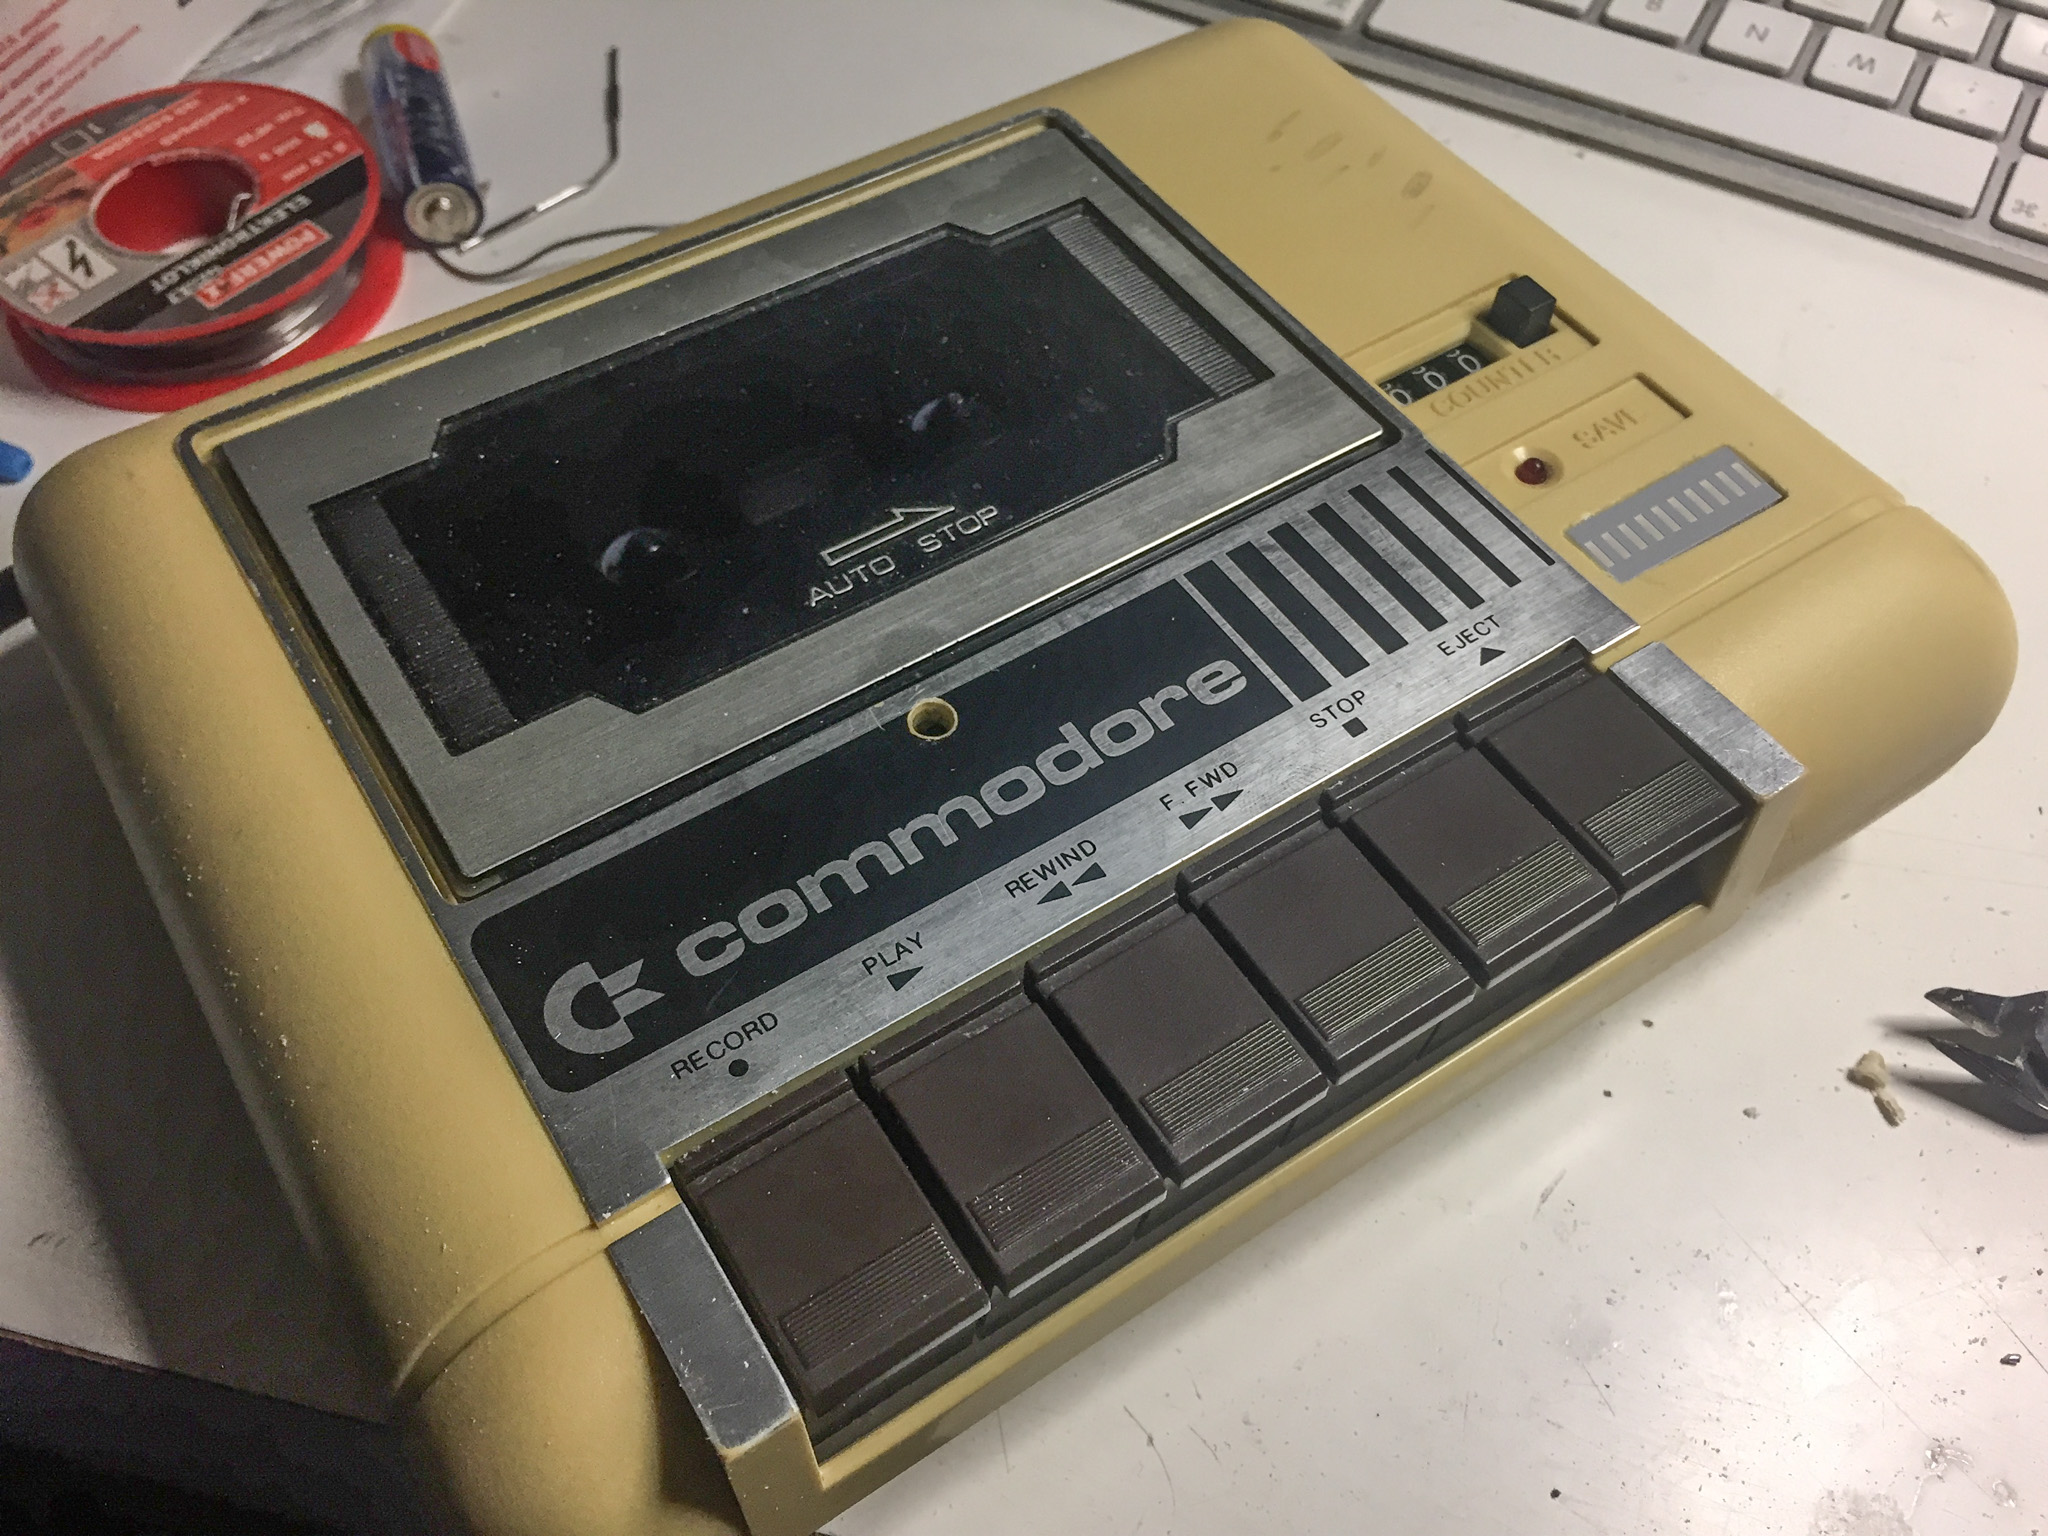
Research on the net showed that there once was a company that added a levelmeter to the original datasets and put knob in place where you usually have to fiddle around with a screwdriver. Those Load-it! branded datasettes have become somewhat rare these days, but some guys over at lemon forum have reversed engineered the module and you can grab’em now here or at ebay.
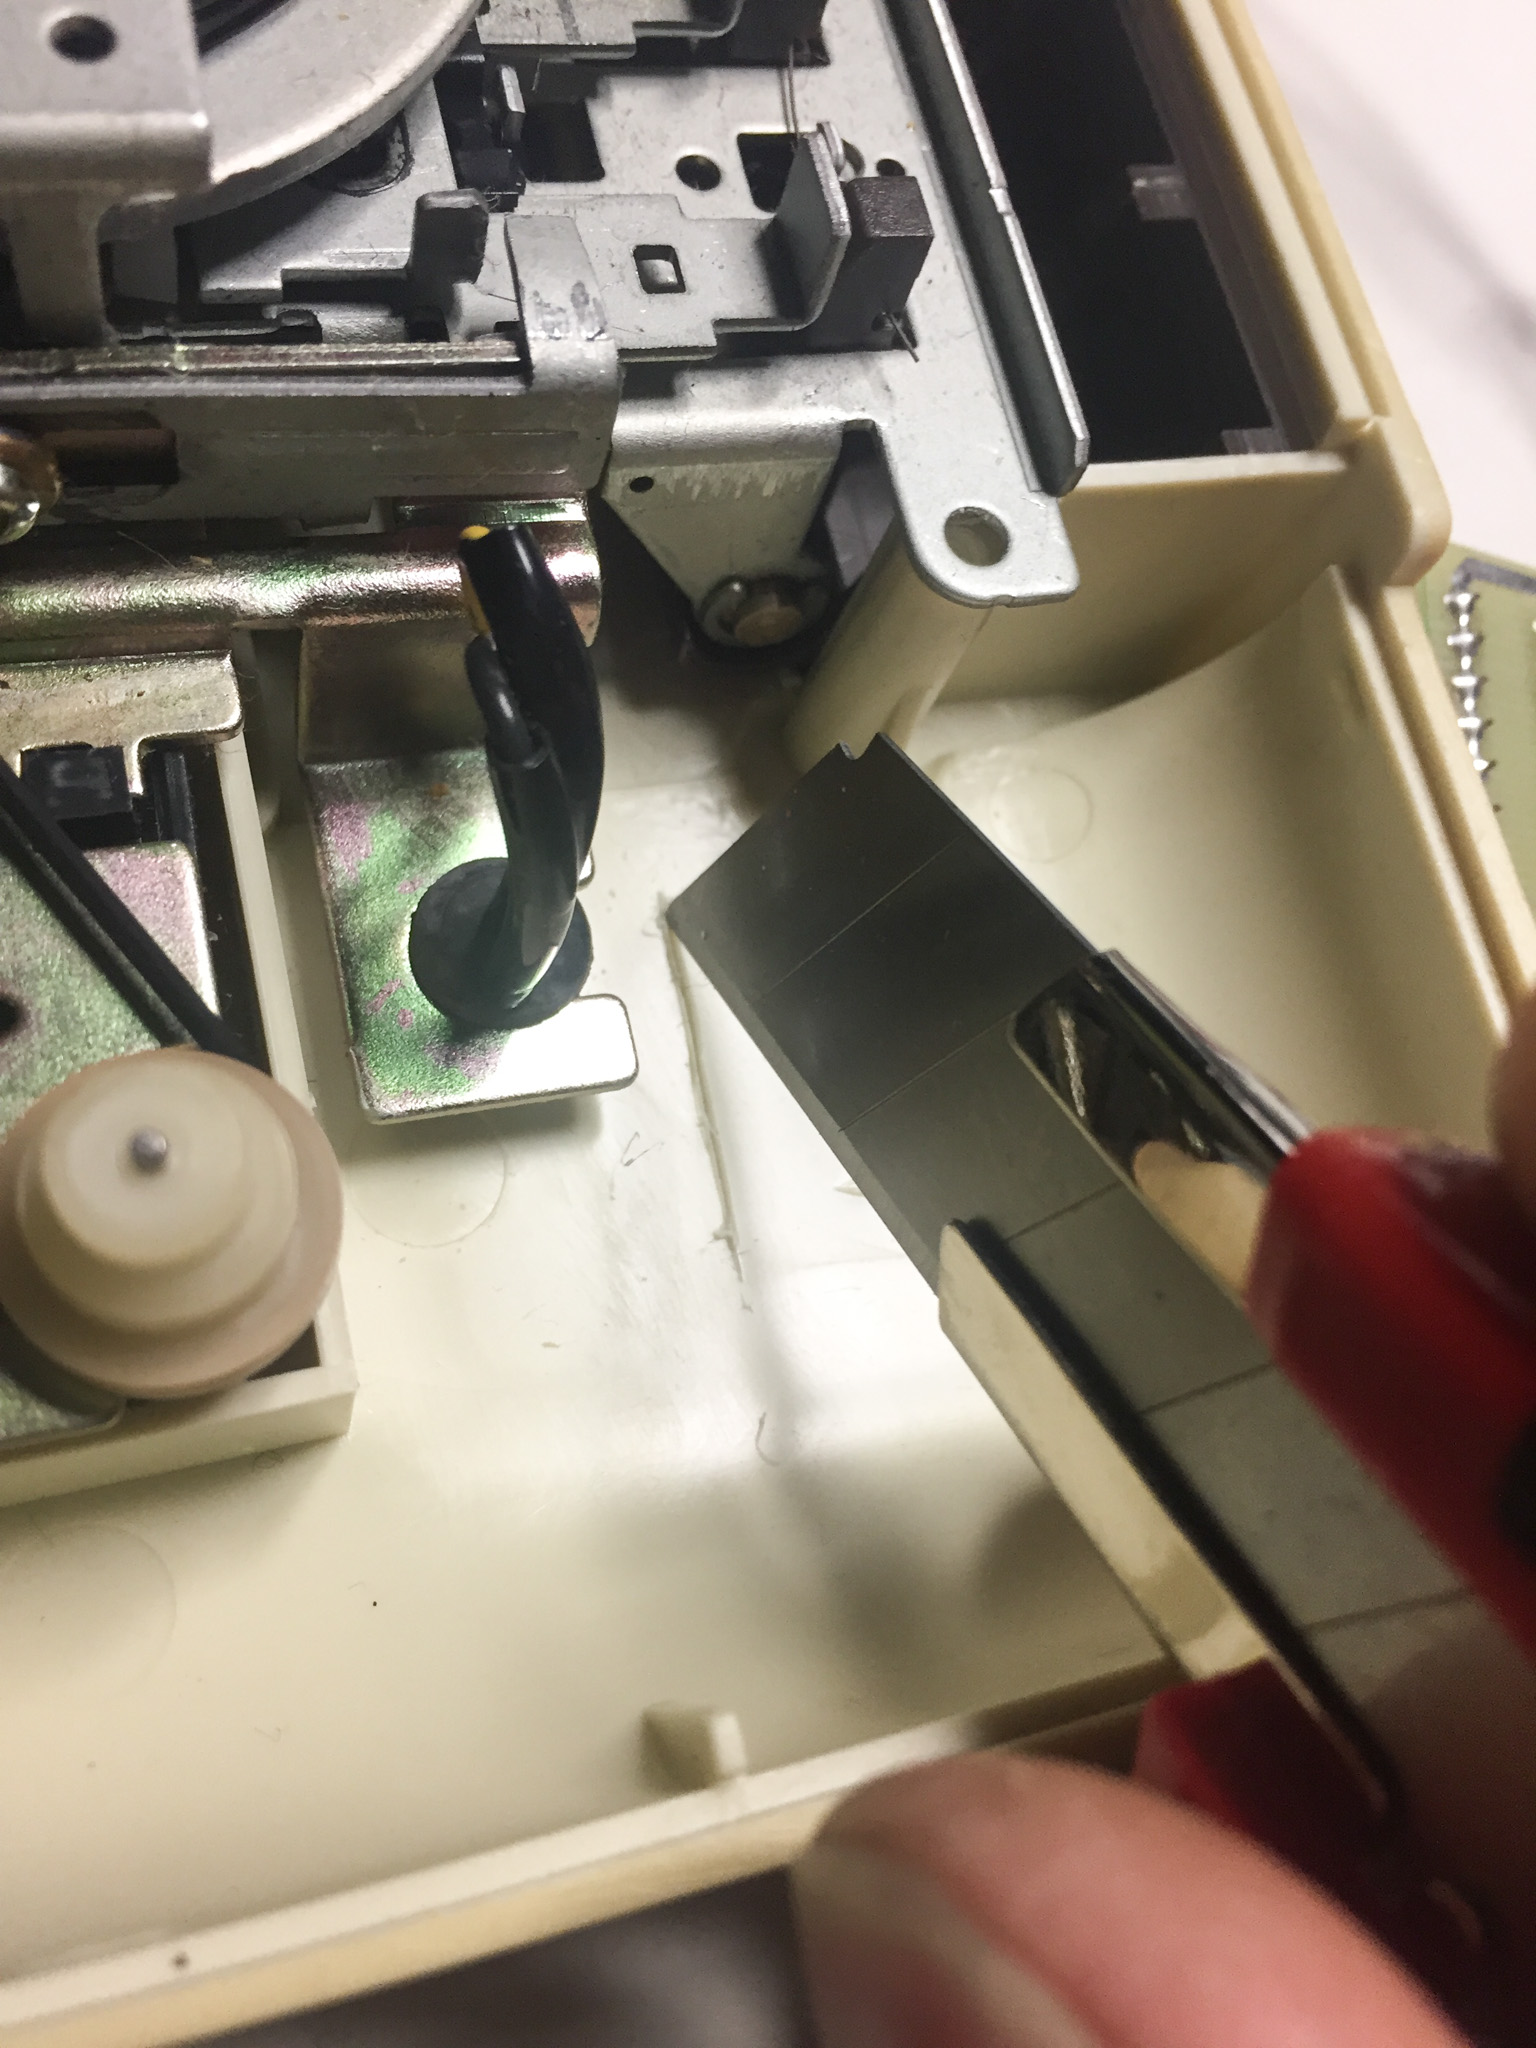
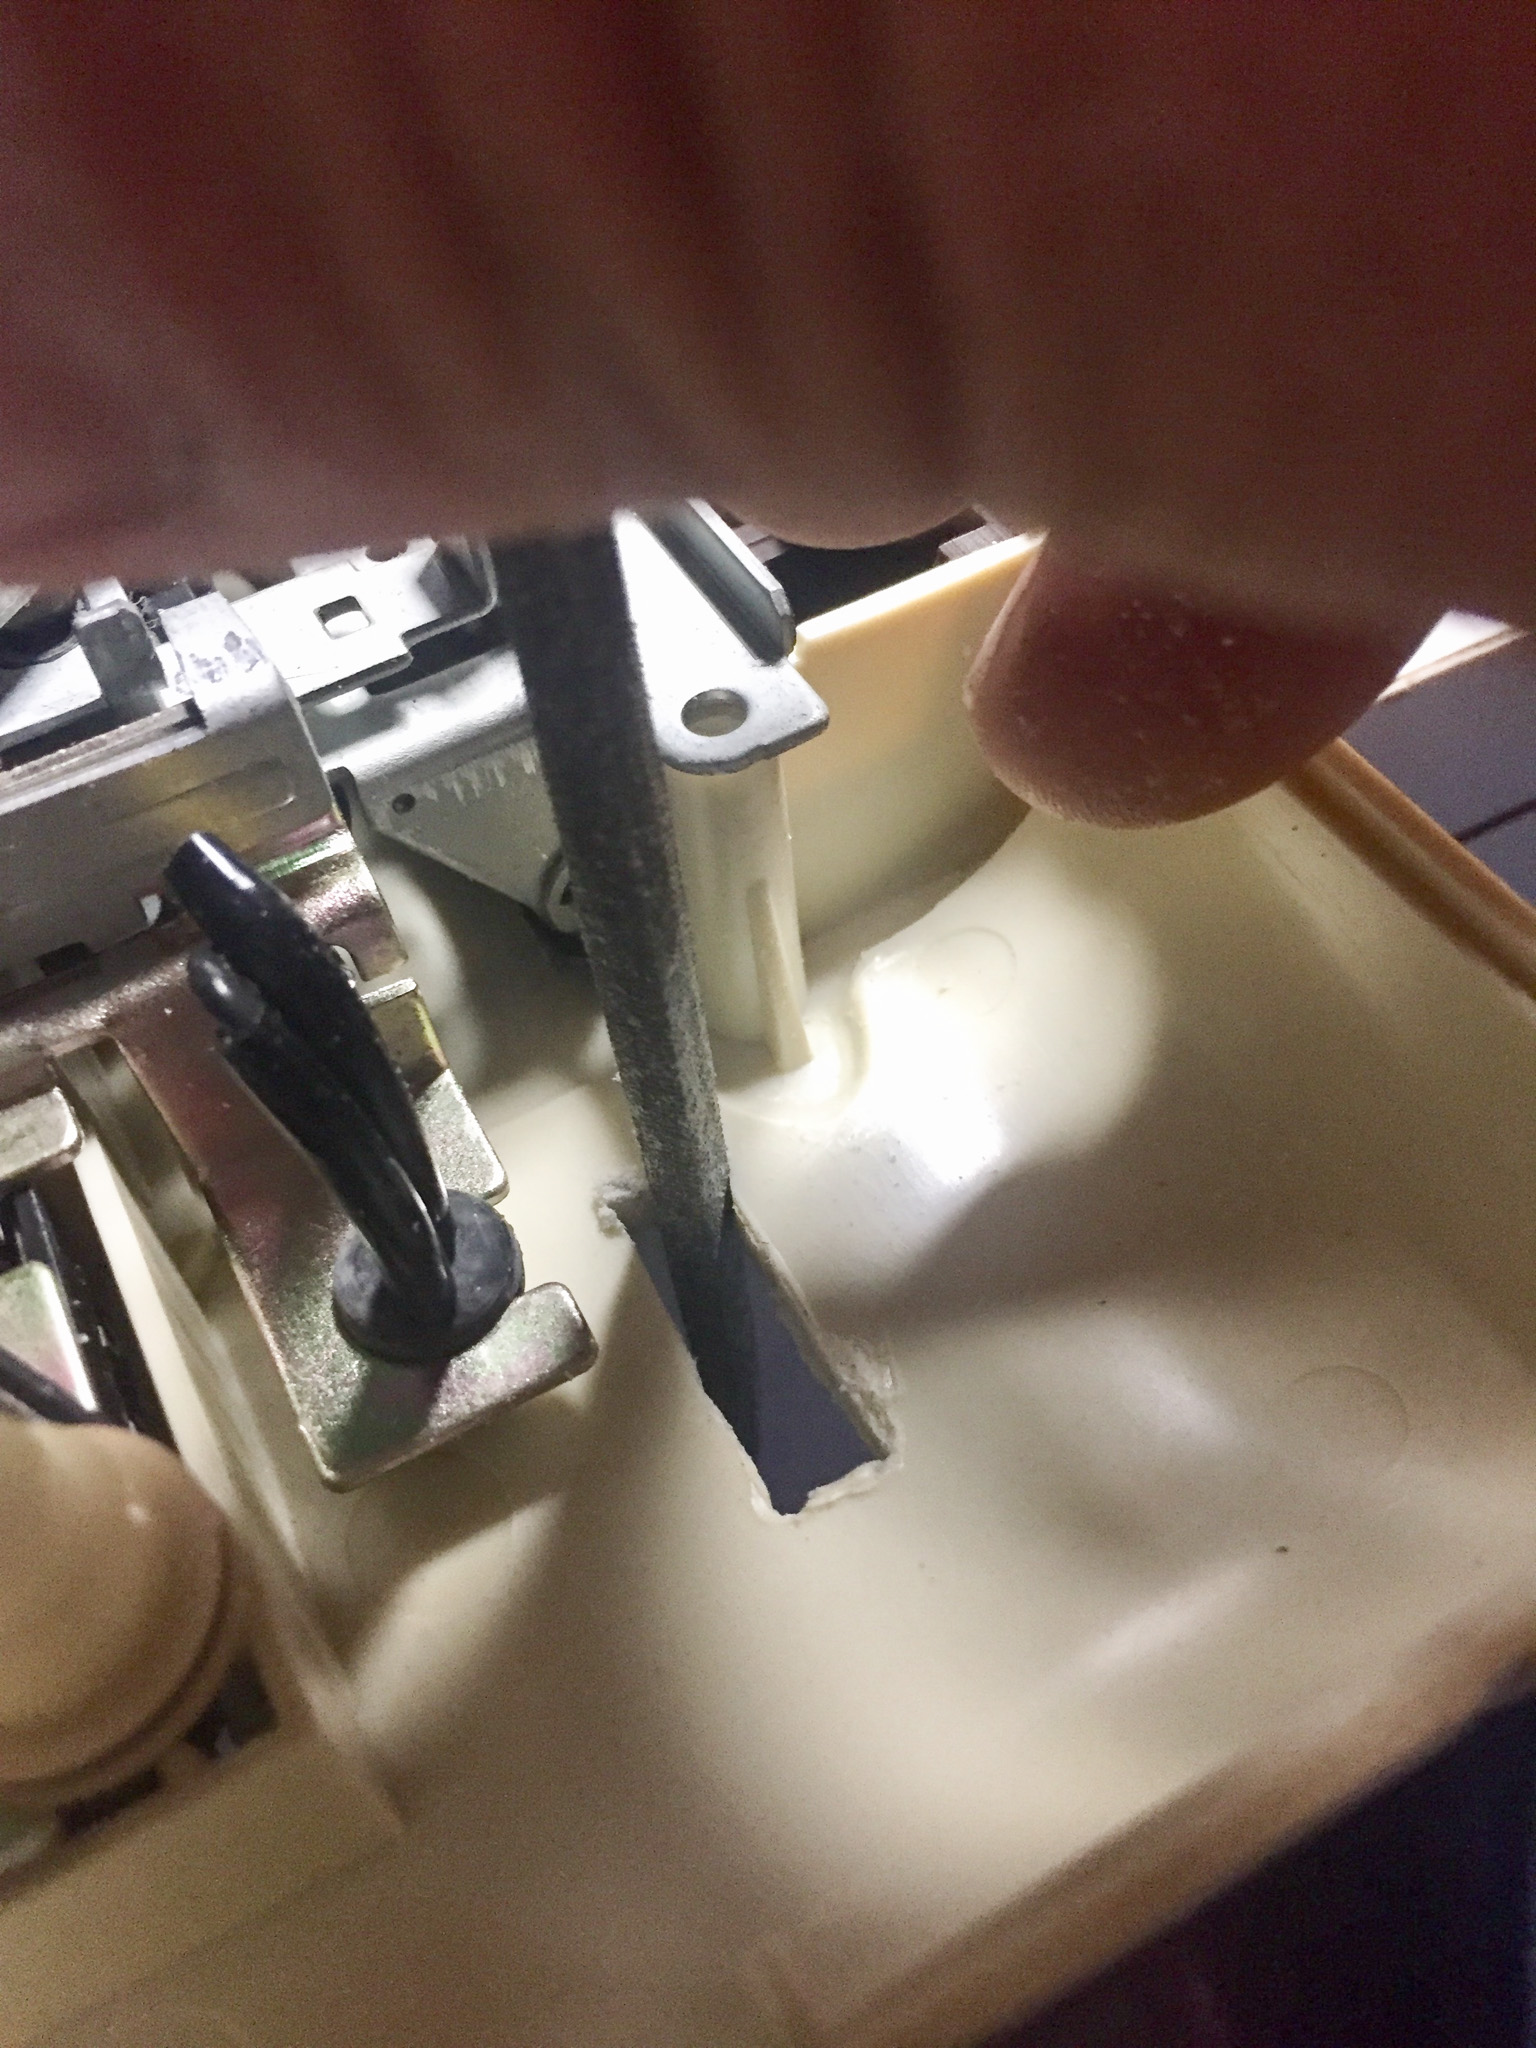
Installing the mod is straight forward, although I did not get any installation instruction from my dealer (except the original Mills instruction and lots of old adds). Google helped out and here is the installation instructions. I was skeptical, as I did not have the two 6562 and found tow others by the marks of LM358DP. A quick check of the datasheet revealed that they have the same pinout. Soldering was done in a couple of minutes but cutting the hole the next task.
Final thoughts: The level meter shows that there is a signal and its strength. Trying to adjust the alignment with a screwdriver and the LEDs only is kind of tricky, when you are used to have fine and detailed feedback like from recorder ustage (and all it’s clones and offspring). So if you want to adjust your datasets properly, it is safer and far more accurate to use tools on the C64 – if you need something to quickly check if the signal is good and coming, this is a good means. Best would definitely be an interface that runs directly on any modern platform… perhaps written in java, that gives the same visual feedback. Anyhow, I found that my original copy of Mission A.D. produces a good signal and so this is the tape I use as default, if I went too far with the screwdriver. You have to be very carefull and only turn a tiny bit and keep in mind that tapes may have passages, where the signal is low or even no signal at all. So far dumped most of my tapes and about two thirds of it could be saved and are carry on life as TAP file from now on.
Some pictures of the process and the final result in action.

Loading process